Merry Christmas!!!
I love this season. Everything about it...it is so joyful.
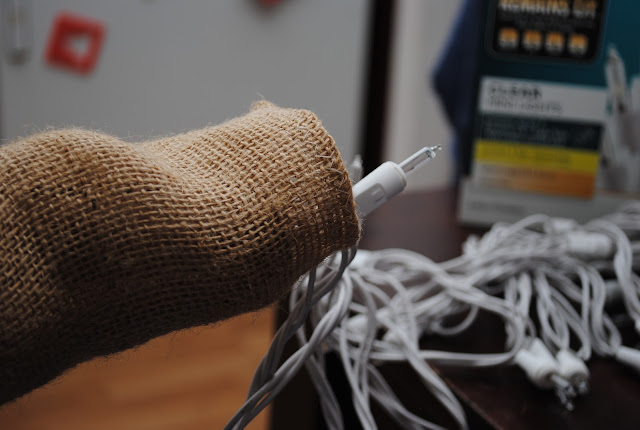
I have one last project to share with you...burlap covered Christmas lights.

I had seen this project on Pinterest, but with no help or tutorial. Burlap wrapped Christmas lights...so pretty! So I thought...how hard can this be? I bought some burlap and cut long strips, and sewed a burlap "sock" for my white Christmas lights. Well, to find out, there is a hard way and an easy way. My first try at this took hours of frustration. So here are some tips that I learned along the way.

1. Don't make your burlap "sock" too long. Burlap is not easy to turn inside out. I ended up making two "socks" and pinning them together. And when I was trying to turn my sock right side out after sewing it, I used a hanger and a large safety pin to pull the burlap through. That definitely helped the process.
 2. Use high-end Christmas lights that remain lit even if one bulb gets broken. This was the moment I almost threw everything in the trash. After finishing the entire sewing part of the project, and yanking the Christmas lights through the "sock", I plugged the lights in and discovered that a bulb had broken. And I had used cheap lights. The lights wouldn't work, even when I replaced a bulb. Don't be like me...I had to take out all of the lights and buy a new string to place in my burlap sock. Very frustrating.

3. Use an empty tube of wrapping paper to feed your string of lights into your burlap sock. Once I discovered that the rough burlap would break my light bulbs, I wanted to find a better way to get the sock around the string of lights.
I used an empty tube of wrapping paper, and placed my lights in the tube. Then I scrunched my burlap sock around the cardboard tube, and fed it along. Granted, it didn't fit the entire length of lights. But this was a MUCH smoother process than my first try...

4. A string of lights is longer than you think. I was shocked at how long my burlap sock needed to be. I guess I rarely have my Christmas lights strung out in a straight line. I didn't realize how long one string would be. Lets just say that I cut many strips of burlap....over and over and over again.
5. Last but not least, double sew your edges on the burlap. This might be a forgone conclusion, but it is a lesson I am learning. Burlap frays easily. I did a straight stitch first and then I went back with a wide stitch to make sure there was very little fraying. I really don't want to have to do this project again.

Thats it!! I only finished one of my burlap socks. I am hoping to get one more done before I put everything in the attic for next year. But since my first 2 tries took 5 hours...well, let's just say I am not as motivated as I should be.
I love this season. Everything about it...it is so joyful.
I have one last project to share with you...burlap covered Christmas lights.

I had seen this project on Pinterest, but with no help or tutorial. Burlap wrapped Christmas lights...so pretty! So I thought...how hard can this be? I bought some burlap and cut long strips, and sewed a burlap "sock" for my white Christmas lights. Well, to find out, there is a hard way and an easy way. My first try at this took hours of frustration. So here are some tips that I learned along the way.

1. Don't make your burlap "sock" too long. Burlap is not easy to turn inside out. I ended up making two "socks" and pinning them together. And when I was trying to turn my sock right side out after sewing it, I used a hanger and a large safety pin to pull the burlap through. That definitely helped the process.
 2. Use high-end Christmas lights that remain lit even if one bulb gets broken. This was the moment I almost threw everything in the trash. After finishing the entire sewing part of the project, and yanking the Christmas lights through the "sock", I plugged the lights in and discovered that a bulb had broken. And I had used cheap lights. The lights wouldn't work, even when I replaced a bulb. Don't be like me...I had to take out all of the lights and buy a new string to place in my burlap sock. Very frustrating.
3. Use an empty tube of wrapping paper to feed your string of lights into your burlap sock. Once I discovered that the rough burlap would break my light bulbs, I wanted to find a better way to get the sock around the string of lights.
I used an empty tube of wrapping paper, and placed my lights in the tube. Then I scrunched my burlap sock around the cardboard tube, and fed it along. Granted, it didn't fit the entire length of lights. But this was a MUCH smoother process than my first try...

4. A string of lights is longer than you think. I was shocked at how long my burlap sock needed to be. I guess I rarely have my Christmas lights strung out in a straight line. I didn't realize how long one string would be. Lets just say that I cut many strips of burlap....over and over and over again.

5. Last but not least, double sew your edges on the burlap. This might be a forgone conclusion, but it is a lesson I am learning. Burlap frays easily. I did a straight stitch first and then I went back with a wide stitch to make sure there was very little fraying. I really don't want to have to do this project again.

Thats it!! I only finished one of my burlap socks. I am hoping to get one more done before I put everything in the attic for next year. But since my first 2 tries took 5 hours...well, let's just say I am not as motivated as I should be.
No comments:
Post a Comment